This page walks you through the full Quartz setup: from getting the source code to previewing your site locally, then pushing it to GitHub.

1. Get Quartz

There are two ways to get started. Pick whichever you prefer:

Why this option?

Using the template creates your own repository in one click — no need to reconfigure Git remotes later.

  1. Go to the Quartz repository and click Use this templateCreate a new repository
  2. Give your repository a name (e.g. quartz, notes, garden), choose public or private, then click Create repository
  3. Clone your new repository and enter the folder:
git clone https://github.com/<your-username>/<your-repo>.git
cd <your-repo>

Option B: Clone Directly

If you don’t use GitHub or prefer a manual setup:

git clone https://github.com/jackyzha0/quartz.git
cd quartz

Note

With this option, you’ll need to point the `origin` remote to your own repository later when you’re ready to publish.

2. Install Dependencies

Important

Quartz requires Node.js 22 or later. Check your version with node -v and upgrade at nodejs.org if needed.

npm i

Note

On subsequent clones of your own repository (e.g. on a new machine), use npm ci instead for a faster, reproducible install from the lockfile.

3. Initialize Your Site

Run the interactive setup wizard:

npx quartz create

This will prompt you for:

  • A template (default, obsidian, ttrpg, blog) — pick the one that matches your use case. See create > Templates for details on each.
  • A content strategy — choose how to populate the content/ folder:
    • new: Start with an empty folder
    • copy: Copy files from an existing folder (e.g. your Obsidian vault)
    • symlink: Link to an existing folder so changes sync automatically
  • A base URL — the URL where your site will be deployed (e.g. mysite.github.io/quartz). Don’t include https://.
  • A link resolution strategy — how to resolve internal links (shortest, absolute, or relative). Skipped for Obsidian and TTRPG templates.

For non-interactive usage and more details, see the `quartz create` CLI reference.

4. Install Plugins

The template you chose references community plugins that need to be installed:

npx quartz plugin install --from-config

This downloads and builds all plugins listed in quartz.config.yaml into .quartz/plugins/.

Tip

If some plugins fail to build, try refreshing them to their latest versions:

npx quartz plugin install --latest

See troubleshooting > Plugins fail to build on a fresh clone for more details.

5. Preview Your Site

npx quartz build --serve

Your site is now running at http://localhost:8080. The dev server watches for file changes and reloads automatically.

At this point you can start writing content in the content/ folder. When you’re ready to publish, continue below to push your site to GitHub and deploy it.


Setting Up Your GitHub Repository

Note

If you used Option A (GitHub Template) in step 1, your repository already exists and origin is already set. You can skip straight to Push Your Site.

To publish your site, you’ll need your own GitHub repository. This section is for Option B (direct clone) users.

Create the Repository

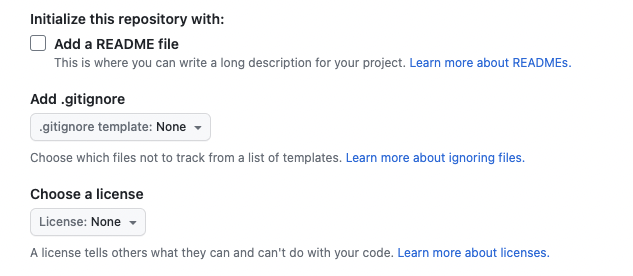
Create a new repository on GitHub.com. Do not initialize it with a README, license, or .gitignore — Quartz already includes these files, and duplicating them will cause merge conflicts on your first push.

Copy the repository URL from the Quick Setup page:

Connect Your Local Clone

Point your local Quartz at your new repository:

# Check current remotes
git remote -v
 
# Point origin to your repository
git remote set-url origin REMOTE-URL

Tip

You don’t need to add an upstream remote manually — npx quartz create already configured it for you. The upstream remote is used by npx quartz upgrade to pull in future Quartz updates.

Push Your Site

npx quartz sync --no-pull

This commits your content and pushes everything to your repository. For subsequent updates, just run:

npx quartz sync

Flags and options

For full help options, you can run npx quartz sync --help.

Most of these have sensible defaults but you can override them if you have a custom setup:

  • -d or --directory: the content folder. This is normally just content
  • -v or --verbose: print out extra logging information
  • --commit or --no-commit: whether to make a git commit for your changes
  • --push or --no-push: whether to push updates to your GitHub fork of Quartz
  • --pull or --no-pull: whether to try and pull in any updates from your GitHub fork (i.e. from other devices) before pushing

Next Steps

  • Authoring Content — Write and organize your notes
  • Hosting — Deploy your site to GitHub Pages, Cloudflare, Netlify, or Vercel
  • Configuration — Customize your site’s appearance and behavior